Serverpilot SSL Installation Guide Video
Step 1. Generating a CSR and Private Key
What is a CSR?
A Certificate Signing Request (CSR) is a vital element in obtaining digital certificates for securing online communications. Used in public key infrastructure (PKI), a CSR is a formal request submitted to a certificate authority (CA), containing essential details and a public key. Its function is to validate the requesting party's legitimacy, facilitating the issuance of a digital certificate. Generated by the entity seeking the certificate, the CSR ensures secure communication by enabling encryption with the corresponding private key. Widely applied in securing websites, email, and network connections, the CSR plays a pivotal role in upholding the integrity and confidentiality of digital interactions on the internet.
Navigate to SSLTrust's CSR Generator and generate your CSR and Private Key.
Note:- Save the generated Private Key and CSR on your device. This might come in handy if you want to re-do the configuration.
Step 2. Order and Configure the SSL Certificate
Next, you need to order an SSL Certificate. If you visit our SSL Certificates List page, you will see options available, such as a low-cost domain-validated SSL or a wildcard SSL which also secures the sub-domains.
Cheap SSL Certificates
View our low cost SSL Certificates with domain validation.
Starting at $ per year
Business Certificates
View our Business Certificates to secure and verify your business.
Starting at $ per year
If you're still unsure of what certificate to choose for your business, please contact our Sales Team and they will be glad to help you out.
1: Once you've added the SSL Certificate into your cart, you can now click on Checkout to complete the process.

Fill in your account details
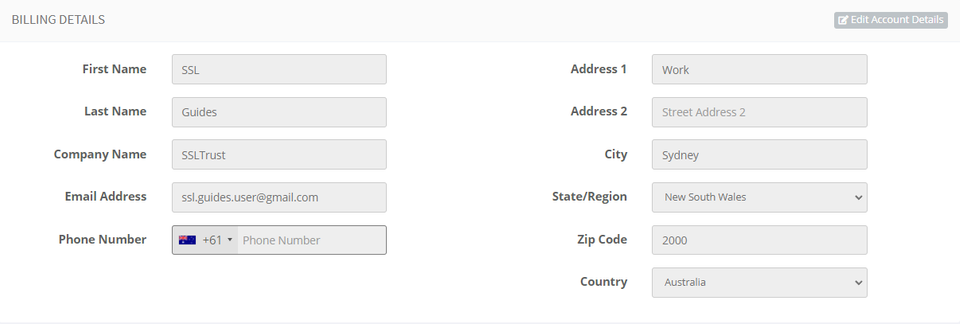
Choose your preferred mode of payment and click on checkout.
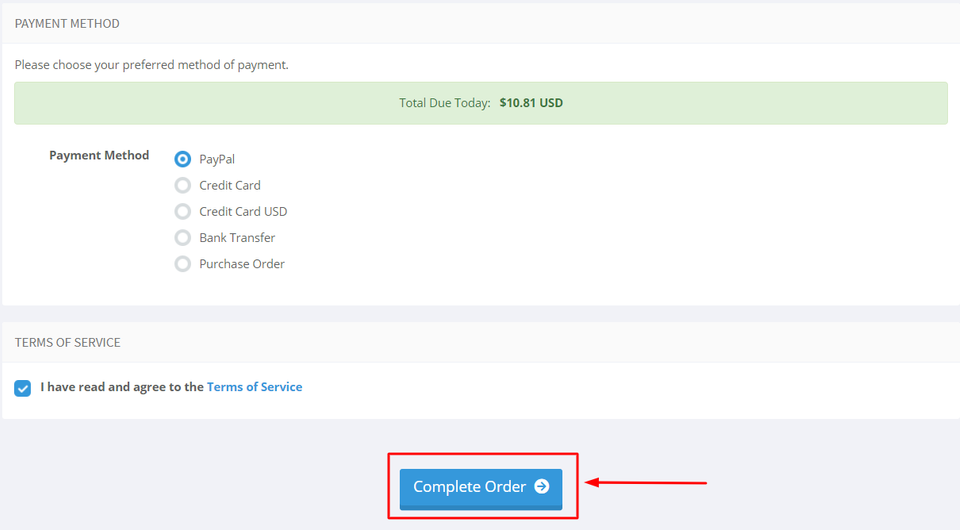
2: After you have purchased the SSL Certificate, you can start the configuration process.
This can be started by going into your SSLTrust account and managing your recent purchase.
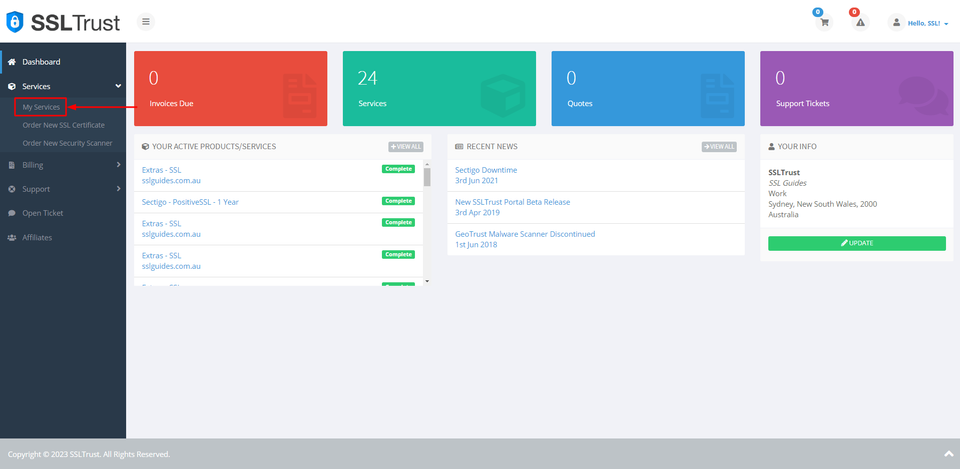
Head over to the SSLTrust Dashboard and under Services, select My Services.
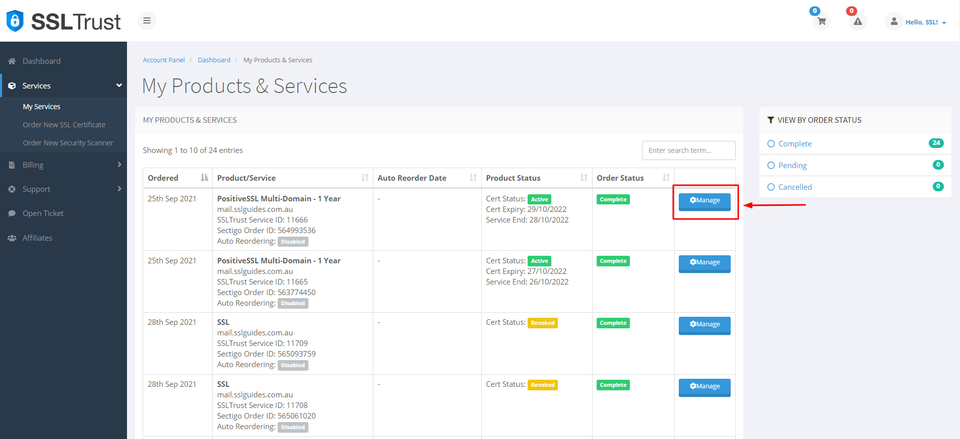
You should be able to see your purchased certificate and order status, now click on Manage
This will take you to the Product Details of your SSL Certificate. Click on start configuration to do the configuration yourself or you can provide the URL below to the appropriate person to complete the configuration for you.

3: Copy and paste the previously generated CSR (Certificate Signing Request) which should include:-
text
-----BEGIN CERTIFICATE REQUEST-----
  -----END CERTIFICATE REQUEST-----
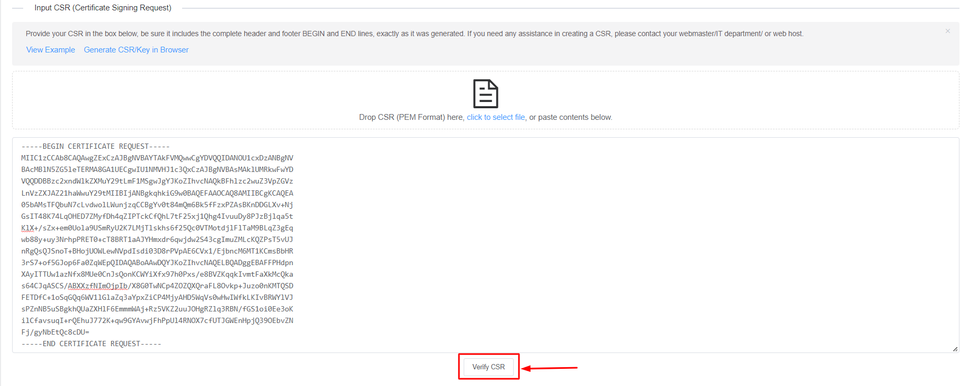
Then, click on Verify CSR.
If the CSR details match the inputs you've entered before, you can now proceed or else generate a new CSR with proper details.

Select the Server Type and click on Next Step>

4: Fill in your contact information
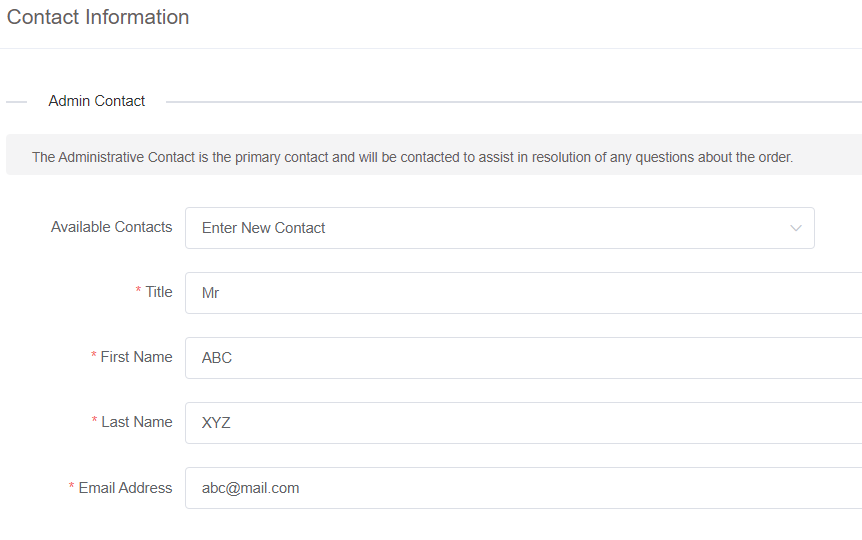
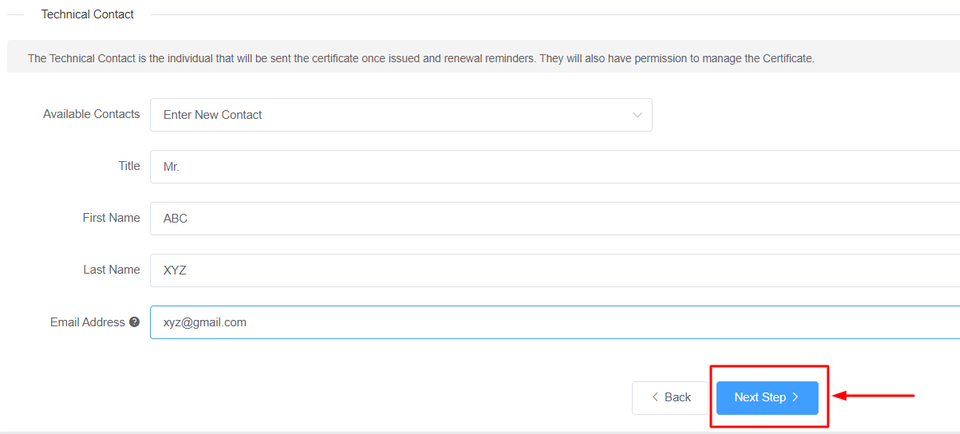
If you have a technical contact managing the certificate for you, please enter their details.
They will also have permission to manage the Certificate and will be sent renewal reminders.
To obtain a business SSL certificate, you will need to provide your business details, including your correct address, phone number, and legal entity name. The Certificate Authority will verify the accuracy of this information. If there are any mistakes, it may cause delays in the process.
Then, click on Next Step
5: The next step in this process is Domain Control Validation (DCV).
DCV, or Domain Control Validation, is a crucial step in SSL certificate issuance. It verifies that the entity requesting the certificate has control over the specific domain by utilizing methods like email verification, file uploads, or DNS changes. This process ensures the legitimacy of SSL certificates and enhances online security.
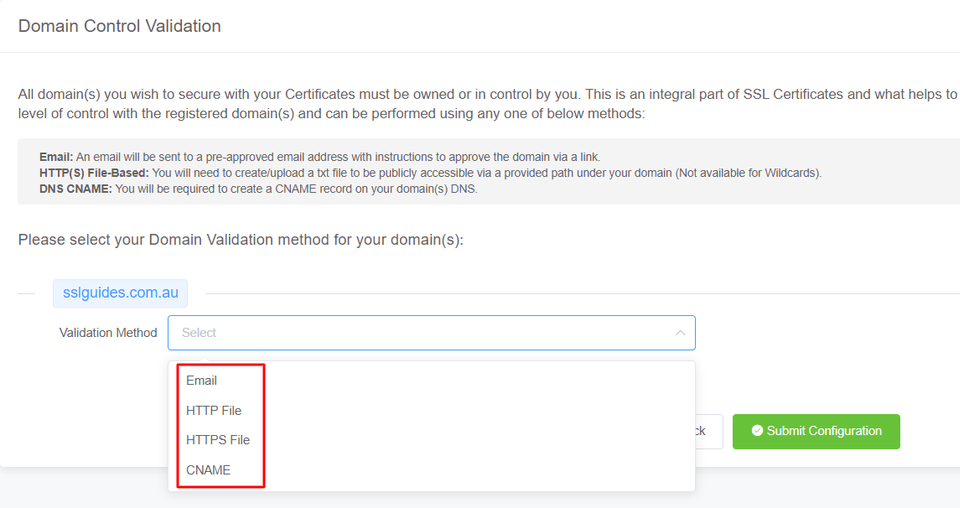
Select the method that is easiest for you. Having an email address with the domain name will be the quickest.
You will be sent an email containing a link which when clicked upon should validate your domain name.
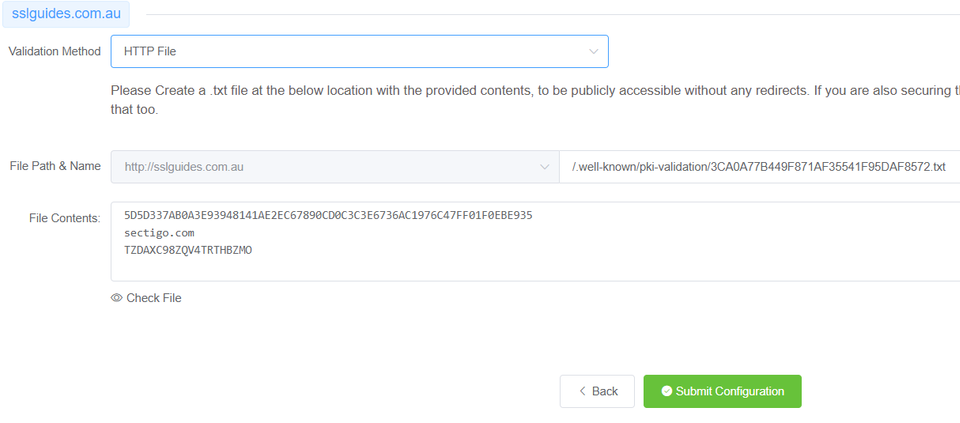
In HTTP/HTTPS File Validation Method, you can create a folder in the specified and directory, paste in the contents and your domain should be validated.
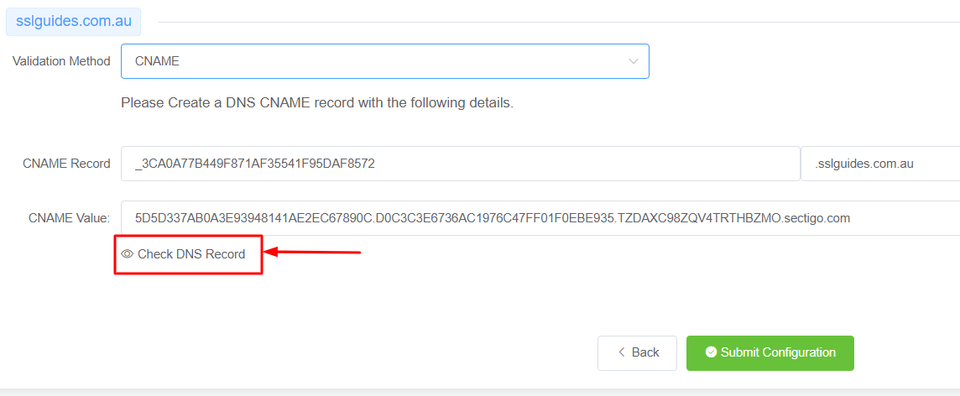
The final method to validate your domain name would be CNAME Validation. Basically you have to create a CNAME record in your DNS Settings to validate your domain name and then click on the Check DNS Record button to verify DNS changes.
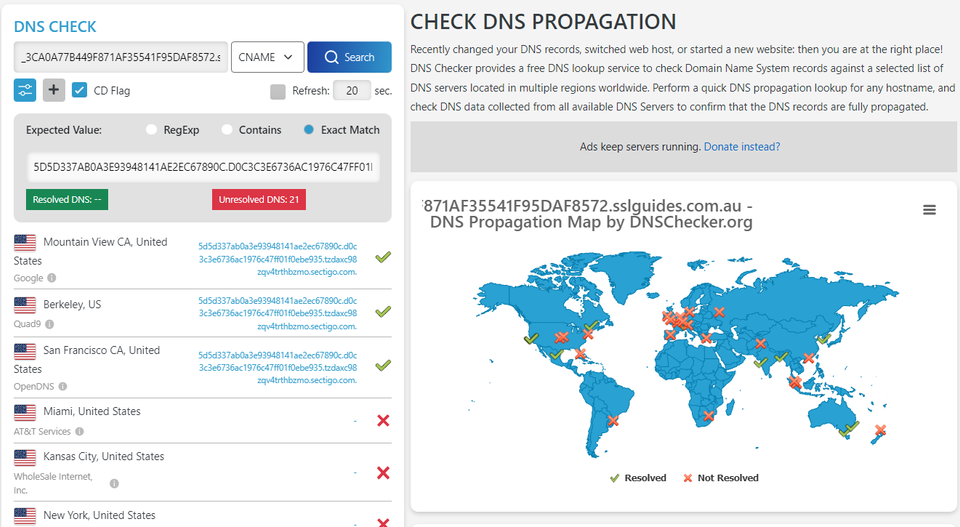
After a few seconds or minutes depending on your DNS propagation speed, the CNAME record should be verified.
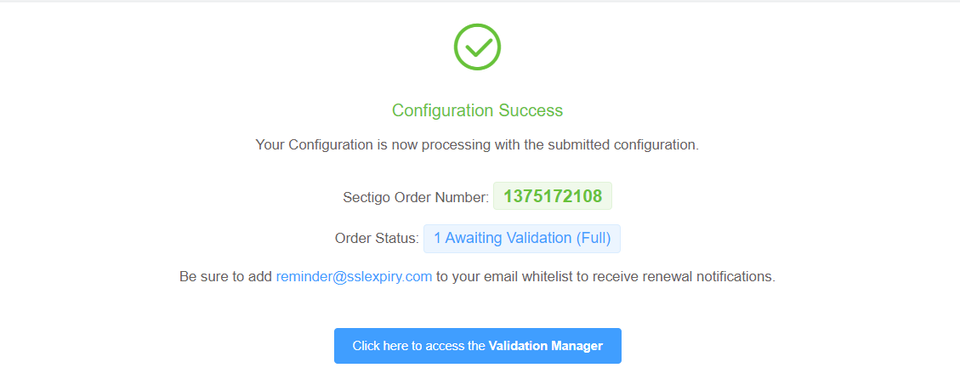
The configuration should be a success. Click on the button below to access the validation manager.
6: Your certificate should have now been issued if you completed all the above steps correctly.
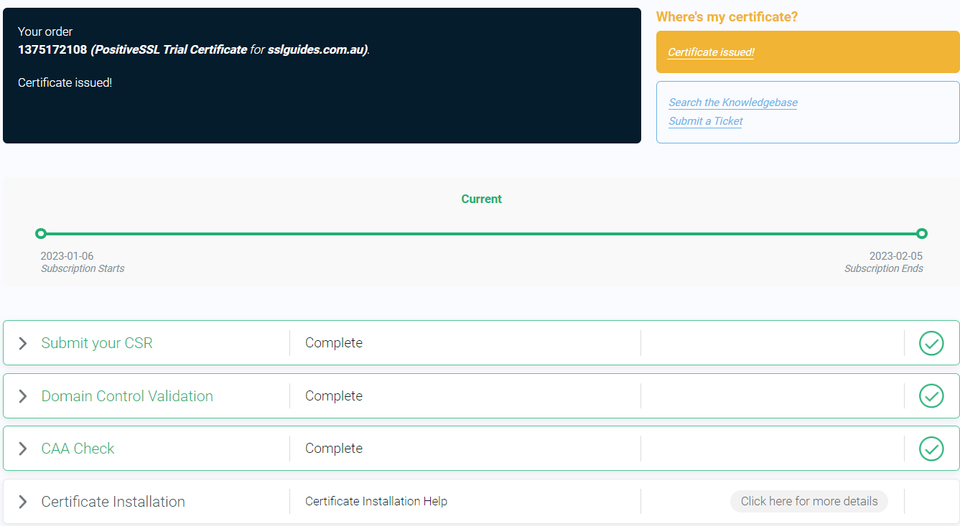
If not, click on Domain Control Validation, and re-submit whatever method you chose for validation.
Upon completing domain validation using the chosen method, your SSL certificate will be issued. If you have ordered a Business SSL, you will need to wait for the Certificate Authority to verify your business address and phone number. If the validation process has not been completed or you have not received your certificate after a certain period of time, please reach out to the support team to check on the status of your certificate.
Step 3. Upload the SSL Certificate Files to your Server
Once your SSL certificate has been issued, you will receive an email with the certificate directly from the Certificate Authority. Alternatively, you can download the certificate from the SSLTrust Portal, which presents the certificate in a convenient, easy-to-use format.
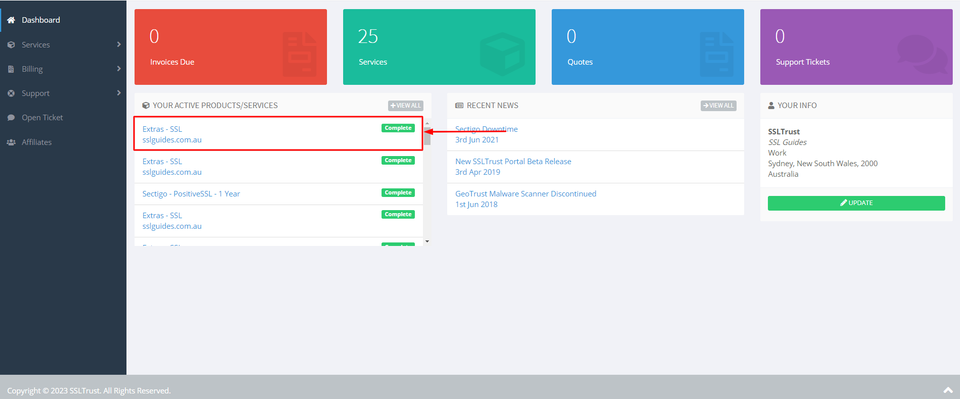
Again, head over to the SSLTrust Dashboard and click on your certificate:-
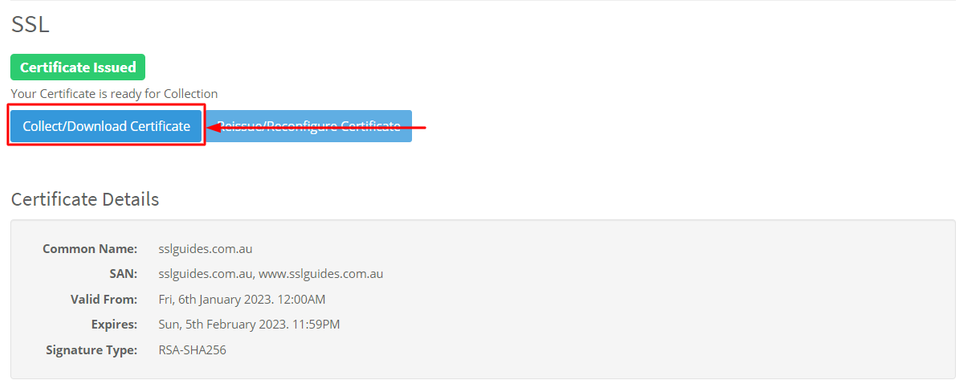
1: Click on Collect/Download Certificate-
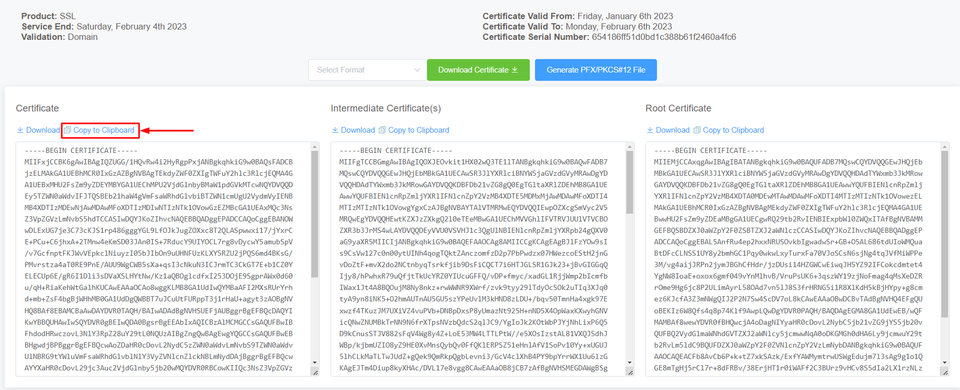
Go to the first column and click on copy to clipboard
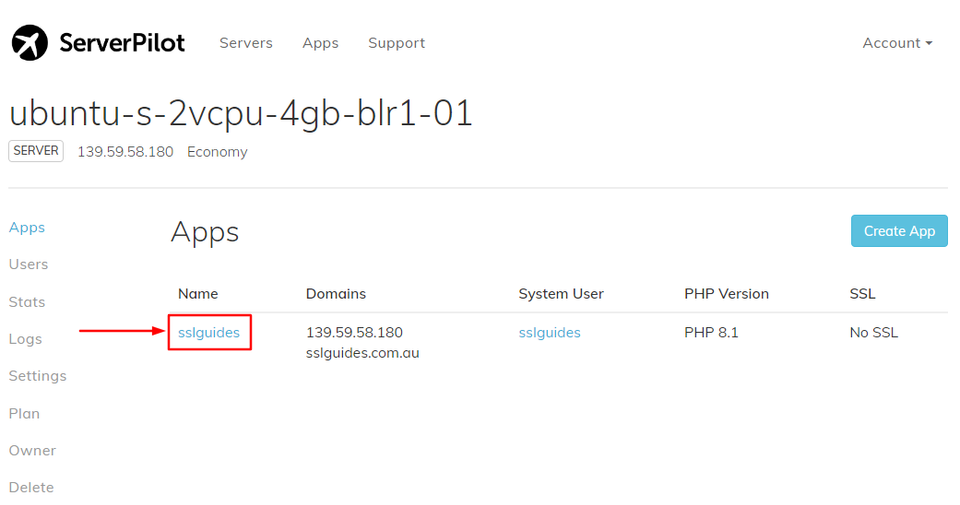
2: Login to your account on Serverpilot and select your server

3: Select/Create your application
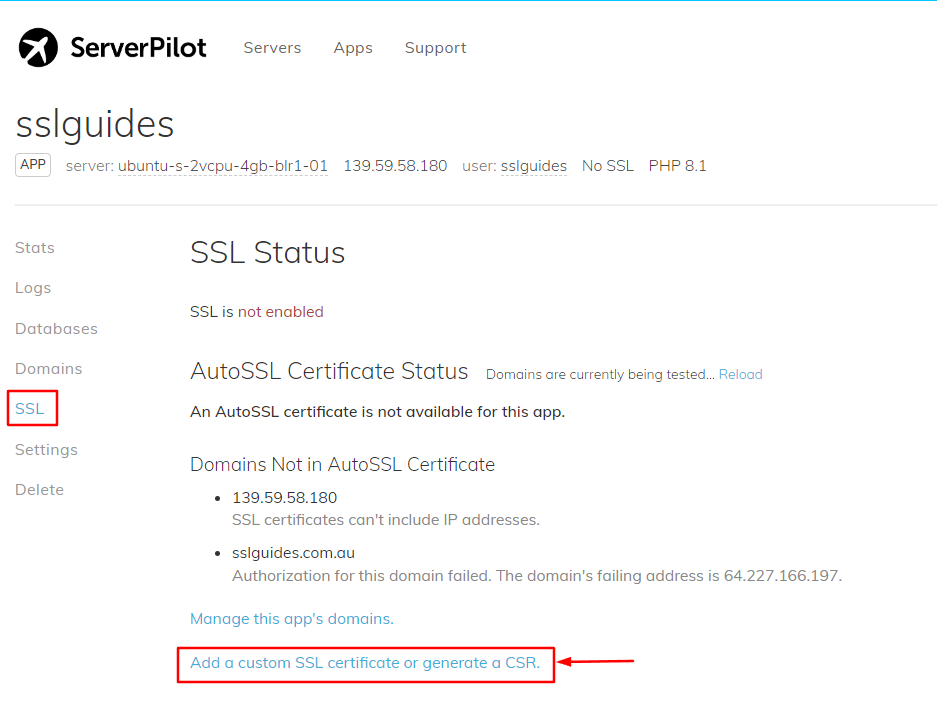
4: Click on SSL on the left menu and then select "Add Custom SSL" at the bottom
5: Paste in your copied primary certificate in the SSL Cert dialog box and then proceed to copy and paste your private key in the SSL Key dialog box.
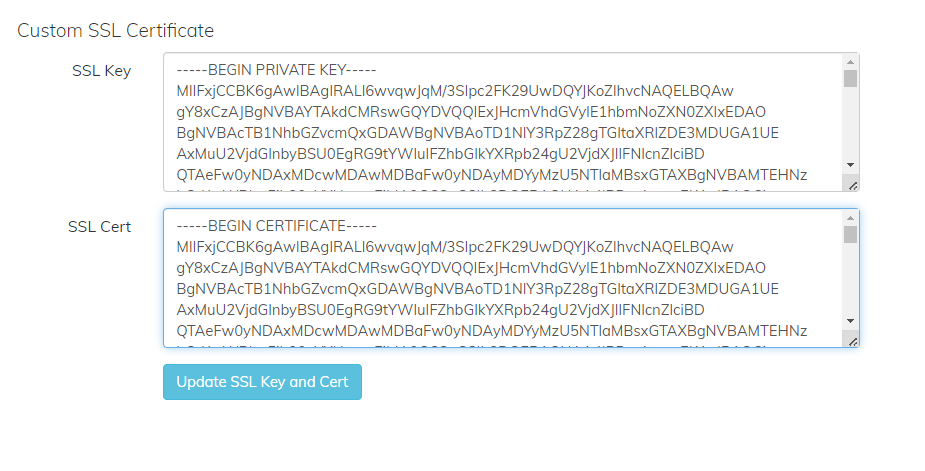
6: Furthermore, head back to the certificate collection page and click on copy to clipboard on the Intermediate certificate.

Proceed to paste your Intermediate Certificate in the SSL Cert dialog box just after the main certificate.
It should look like this:-
text
-----BEGIN CERTIFICATE-----
    MAIN CERTIFICATE DATA
  -----END CERTIFICATE-----
  -----BEGIN CERTIFICATE-----
  INTERMEDICATE/CHAIN CERTIFICATE DATA
  -----END CERTIFICATE-----
7: Finally, click on Submit.
Now, navigate to https:// yourdomain.com to view your secure website.
Step 4. Test the SSL Certificate
SSLTrust's Free SSL Checker is a tool that allows you to test and validate the SSL/TLS certificates installed on websites. Simply enter a domain name and it will analyze the certificate, providing details like the issuer, expiration date, encryption strength, and whether the certificate is properly configured and trusted by major browsers and operating systems. In SSL tests, receiving an "A" rating typically signifies that the SSL certificate and its configuration meet high security standards.
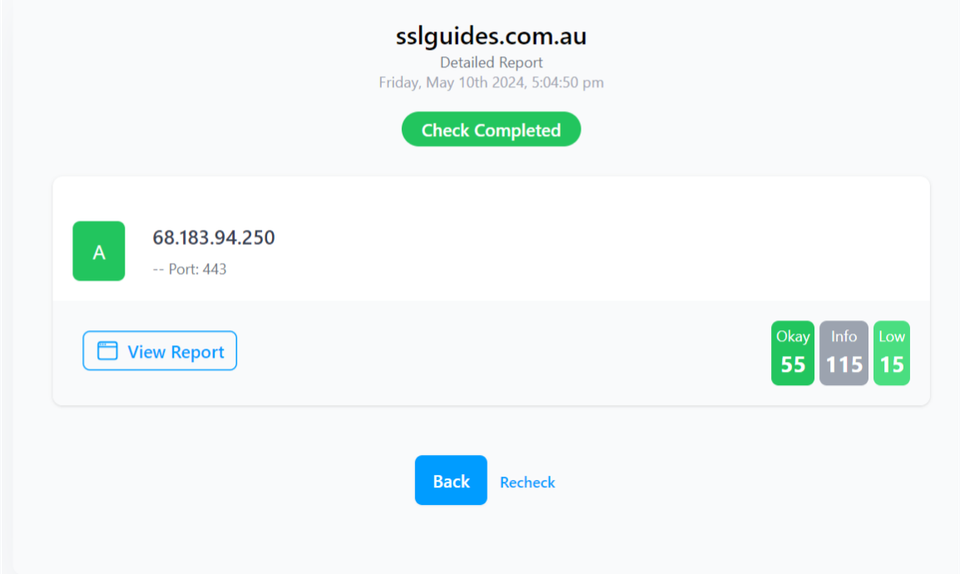
The checker highlights any potential security issues or misconfigurations with the SSL implementation. This free tool makes it easy to verify if a website's SSL certificate is valid and secure, giving visitors confidence their connection is encrypted and their data is protected from eavesdroppers.
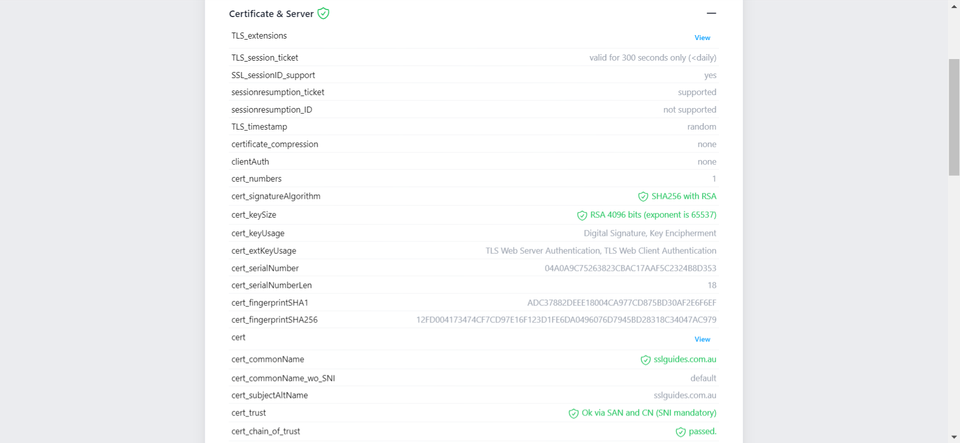
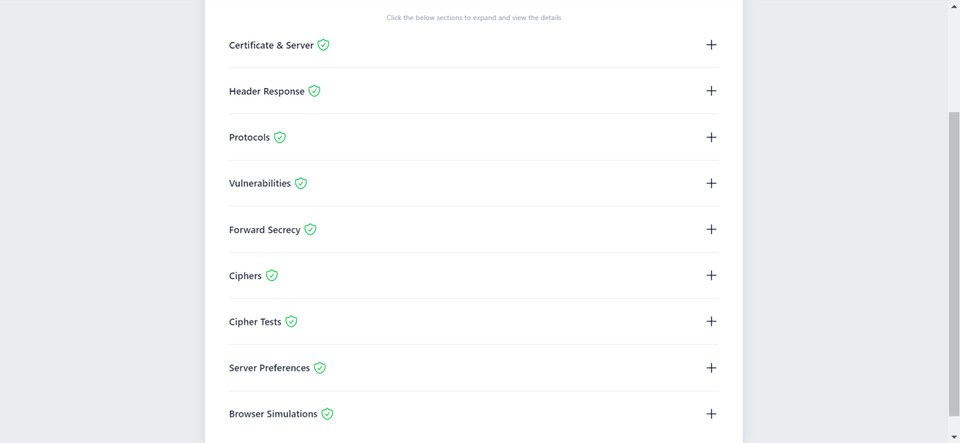
Additionally, you can also performed a detailed check which generates an actionable report with all the ins and out of your SSL Certificate. This includes Protocols, Ciphers, Vulnerabilities and much more.
-
You might require assistance from your web developer or make the necessary updates to your website personally to ensure that all files utilize "https://" and all links leading to and within your website employ "https://".
Discussions and Comments
Click here to view and join in on any discussions and comments on this article.


