A common pattern in the design of highly available systems is to use a pair of load balancers in front of all of your other services. Today we’re going to explore HAProxy 2 in combination with Keepalived, a software package that allows two servers to share a single virtual IP by way of gratuitous ARP. Due to this, Keepalived requires your servers to be layer 2 adjacent. If an organization needs even more of a guarantee of high availability than this provides, it is time to evaluate georedundant options, which is beyond the scope of this article. (Though there do exist solutions that extend your L2 network between datacenters, for example via MPLS or SDWAN).
After we have our set of load balancers, we will look at configuring HAProxy with 3 member servers in a single pool. The assumption is that each of these servers is stateless. Session state is stored in a database (which should also be highly available, such as a MySQL/MariaDB Galera cluster). In this configuration, we can lose either load balancer, and the requests will continue to be proxied to the backing service. We can lose any two of the cluster servers and the remaining server will seamlessly continue to serve requests, as long as it can handle the load. HAProxy provides for different levels of guarantee that clients will not be interrupted when taking down a node. For most organizations, it is acceptable for clients to occasionally have to refresh the page when they’re unlucky enough to be hitting a node that has been taken down. If downtime is under a second, most users will not notice the disruption. For organizations dealing for which this is not enough of a guarantee, HAProxy 2.0 has been released with some bleeding-edge features which mitigate this. Layer 7 retries allow HAProxy to send failed requests to another node. This requires the backing application to support this behavior, as some applications are not smart enough to correctly process a POST request they are not expecting.
Setting up KeepAliveD on machines HAProxy1 and HAProxy2
First, let’s setup keepalived between the two nodes, HAProxy1 and HAProxy2. This article assumes Ubuntu Server 18.04 LTS is being used, but the concepts remain the same for other distributions and the syntax remains similar.
shell
sudo apt-get install linux-headers-$(uname -r)
sudo apt-get install keepalived
Once installed, create the file /etc/keepalived/keepalived.conf . Populate it with the following:
text
! Barebones conf File for keepalived

  global_defs {
     notification_email {
       administrator@example.com
     }
     notification_email_from HAProxy1@example.com
     smtp_server mymailserver.example.com
     smtp_connect_timeout 60
  }

  vrrp_instance VI_1 {
      state MASTER
      interface eth0
      virtual_router_id 101
      priority 101
      advert_int 1
      authentication {
          auth_type PASS
          auth_pass 12345678
      }
      virtual_ipaddress {
          192.168.3.135
      }
  }
For the second load balancer node, follow the same steps but we’ll change out the notification from email to reference the name of the second node, HAProxy2. On the second node, dial the priority down to 50. This insures the nodes can make a decision as to who is the master.
Testing Failover with KeepAliveD
Start the keepalived service on both nodes by issuing:
shell
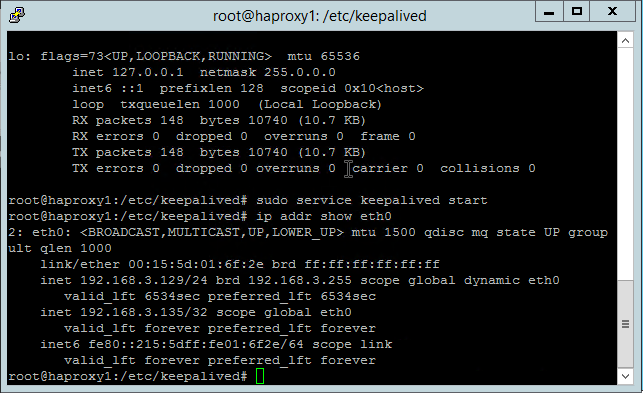
sudo service keepalived start
Notice how HAProxy1 has our virtual IP assigned as an additional interface on ETH0...
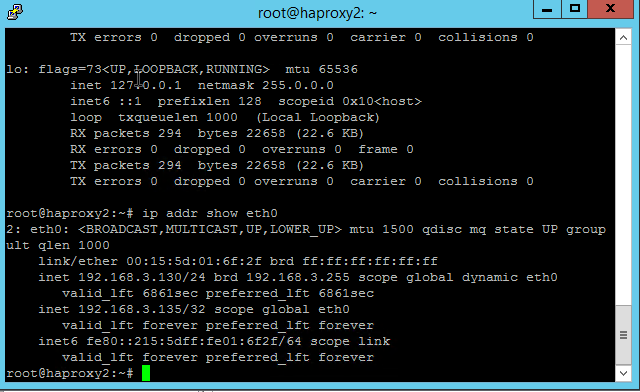
Notice that HAProxy2 does not...
To verify failover occurs as expected, set up a continuous ping against the virtual IP and stop the keepalived service on HAProxy1.
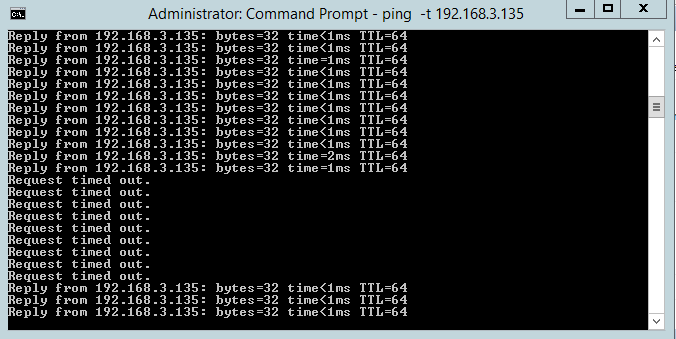
We only lost a handful of ICMP requests before HAProxy2 started handling requests.
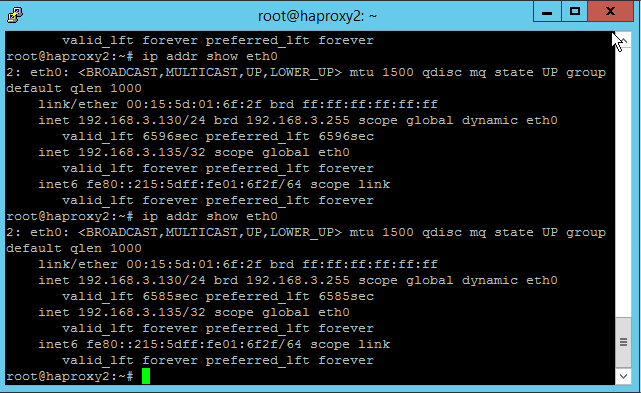
With the command:
shell
ip addr show eth0
we now see that HAProxy2 has control of the virtual address 192.168.3.135.
This virtual address is what we will bind HAProxy to on both machines.
Installing HAProxy
Install HAProxy on each node by issuing:
shell
Apt-get install haproxy
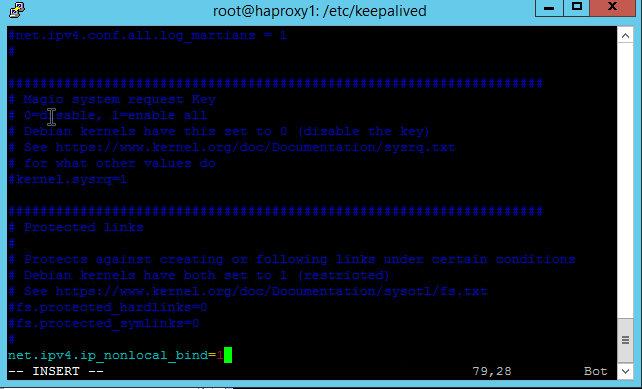
In order to allow HAProxy to bind to an IP Address that isn’t necessarily going to always be present on the system, we need to set a special kernel option.
Edit /etc/sysctl.conf to set the property:
text
Net.ipv4.ip_nonlocal_bind=1
Add this line to the end of the file.
Save the file and issue
shell
sysctl -p
to allow the currently running kernel to reload its options. Make sure to run through this on both HAProxy nodes.
Configuring HAProxy
Next, edit /etc/haproxy/haproxy.cfg on both nodes to contain:
text
global
    log /dev/log    local0
    log /dev/log    local1 notice
    chroot /var/lib/haproxy
    stats socket /run/haproxy/admin.sock mode 660 level admin expose-fd listeners
    stats timeout 30s
    user haproxy
    group haproxy
    daemon

    # Default SSL material locations
    ca-base /etc/ssl/certs
    crt-base /etc/ssl/private

    # Default ciphers to use on SSL-enabled listening sockets.
    # For more information, see ciphers(1SSL). This list is from:
    # An alternative list with additional directives can be obtained from
    #  https://mozilla.github.io/server-side-tls/ssl-config-generator/?server=haproxy
    ssl-default-bind-ciphers ECDH+AESGCM:DH+AESGCM:ECDH+AES256:DH+AES256:ECDH+AES128:DH+AES:RSA+AESGCM:RSA+AES:!aNULL:!MD5:!DSS
    ssl-default-bind-options no-sslv3

defaults
    log global
    mode    http
    option  httplog
    option  dontlognull
        timeout connect 5000
        timeout client  50000
        timeout server  50000
    errorfile 400 /etc/haproxy/errors/400.http
    errorfile 403 /etc/haproxy/errors/403.http
    errorfile 408 /etc/haproxy/errors/408.http
    errorfile 500 /etc/haproxy/errors/500.http
    errorfile 502 /etc/haproxy/errors/502.http
    errorfile 503 /etc/haproxy/errors/503.http
    errorfile 504 /etc/haproxy/errors/504.http

frontend www.mysite.com
    bind 192.168.3.135:80
    default_backend web_servers

backend web_servers
    balance roundrobin
    server server1 192.168.3.131:80 check
    server server2 192.168.3.132:80 check
    server server3 192.168.3.133:80 check
We can use the following command to validate the configuration file and fix any syntax errors that will prevent HAProxy from starting:
shell
haproxy -c -V -f /etc/haproxy/haproxy.cfg
Testing HAProxy
Each member server is simply running nginx on port 80, responding with its node name for demonstration purposes. The load balancer round robins connections, so each page refresh will result in a different member name being displayed.

Now, if we stop keepalived on the member that owns the IP, the IP will be picked up by the other HAProxy node and keep serving requests.
Adding SSL/TLS to the frontend configuration
Let’s say that we have a static website, and want the SEO boost from having SSL/TLS enabled but don’t send sensitive information to our servers. In this case, it’s a valid decision to enable SSL/TLS at the cluster level and terminate over plain HTTP to the backend servers. (If your site has the capability for users to login, you’ll want to configure HTTPS end to end – that is, between the load balancer and the backend servers too!).
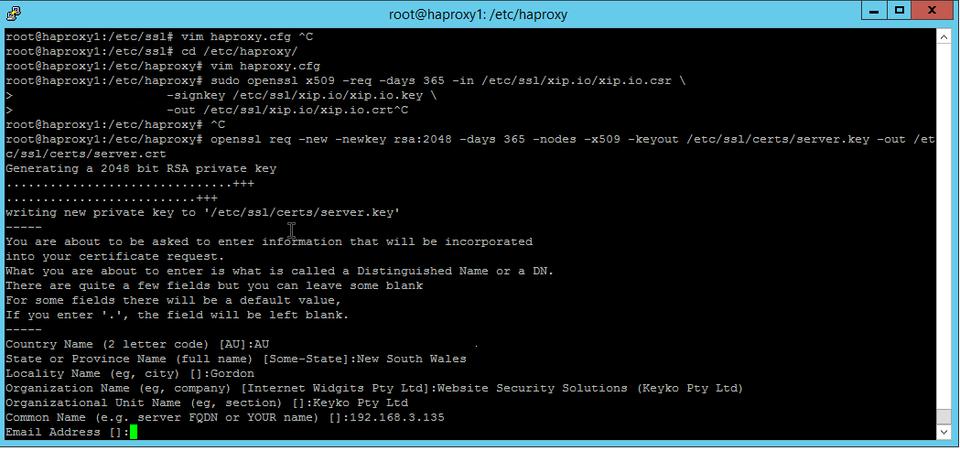
Simply generate a certificate and edit the haproxy.cfg file on both nodes. For this demonstration we will generate a self-signed certificate, but if your service is internet facing (or even if it is not and you want to insure the utmost security of your service) you would generate a CSR and get a signed certificate from a certificate authority. We have many available SSL Certificates available here.
shell
openssl req -new -newkey rsa:2048 -days 365 -nodes -x509 -keyout /etc/ssl/certs/server.key -out /etc/ssl/certs/server.crt
This Will generate a self-signed certificate suitable for HAProxy. You will be prompted for some information.
Turn the key material and certificate into a single PEM file with the following command:
shell
sudo cat /etc/ssl/certs/server.crt /etc/ssl/certs/server.key | tee /etc/ssl/mycert.pem
Since we only need this pem file, we will cleanup the temporary files we created and assign the correct permissions such that only the haproxy user on the system can access the pem file on the file system. This is a security best practice.
shell
Rm /etc/ssl/certs/server.crt
Rm /etc/ssl/certs/server.key
Chown haproxy:haproxy /etc/ssl/mycert.pem
Chmod 700 /etc/ssl/mycert.pem
Next, we need to edit our "frontend configuration" in haproxy.cfg to make use of the new certificate pair.
text
frontend www.example.com
    bind *:80
    bind 192.168.3.135:443 ssl crt /etc/ssl/mycert.pem
    redirect scheme https if !{ ssl_fc }
mode http
default_backend web_servers
Notice that we are binding on port 80 as well in order to redirect incoming HTTP connections to HTTPS.
Finally, restart HAProxy.
Note that if we were using a public ally signed certificate, the browser would trust the site.

Configuring Layer 7 retries
New in HAProxy 2 as of May 2019 are Layer 7 retries. Layer 7, also known as the application layer, references the layer of the OSI model at which the protocol HTTP operates. This allows the load balancer, when terminating a connection, to simply try against a different node before reporting a status to the client. This is an absolute game changer, because for the very first time taking a node out of the mix doesn’t involve announcing your intention to do so and waiting for it to be inactive.
This feature does require an application which handles this gracefully though. It is best suited for a shop that develops in-house and can make sure that nodes share all of their configuration in the underlying database layer. If the nodes cannot continue in the middle of a conversation to another node, this can cause data inconsistency.
If you are sure your application supports this advanced configuration, simply modify your backend configuration in haproxy.cfg to read as follows:
text
backend web_servers
    balance roundrobin
    retry-on all-retryable-errors
    server server1 192.168.3.131:80 check
    server server2 192.168.3.132:80 check
    server server3 192.168.3.133:80 check
There are also other, safer options for Layer 7 retries that, for example only attempt the Layer 7 retry if the connection to the first node (now offline) was the initial request and was rejected. This can be achieved with
text
backend web_servers
    balance roundrobin
    retry-on conn-failure
    server server1 192.168.3.131:80 check
    server server2 192.168.3.132:80 check
    server server3 192.168.3.133:80 check
Finally, depending on application architecture, one might want to allow GET requests to retry with impunity, but for POST requests to be re-tried by the user.
text
backend web_servers
   retry-on all-retryable-errors
    http-request disable-l7-retry if METH_POST
    server server1 192.168.3.131:80 check
    server server2 192.168.3.132:80 check
    server server3 192.168.3.133:80 check
This only scratches the surface of the sorts of things HAProxy is able to do. Whether you’re architecting a highly available application for the very first time, or tired of paying maintenance fees for commercial load balancing hardware and solutions, HAProxy is worthy of consideration.
Discussions and Comments
Click here to view and join in on any discussions and comments on this article.